
This article has been contributed by Andy Day.
Making your brand’s photos stand out on social media is a constant challenge, as is creating attractive imagery for your blog and website. This guide will provide you with a wealth of ideas for making your photos cinematic and engaging, tapping into the vibe of the silver screen to give your work a polished and professional feel.

Many of these tips will require you to have a DSLR or a mirrorless camera, but there are still plenty of ideas if all you have is your smartphone. Photography gear is only one part of the equation when it comes to achieving a cinematic look, and there are a few shortcuts if you’re photographing on limited equipment – something plenty of the professional photographers featured on sites like Shotkit do each day in their work.
1. Create a Shallow Depth of Field
One of the distinctive characteristics of cinema is that large lenses coupled with huge cameras combine to create a very shallow depth of field — in other words, a sharp subject and gorgeous, blurry background.

Because this look has dominated cinema for so long, our brains tend to assume that any differential focus is part of the same Hollywood aesthetic.
A shallow depth of field has practical uses beyond making your photos look cinematic. You can use selective focus to push the viewer’s attention to a particular part of a frame, making a subject stand out.
You can also use this technique to make parts of an image less distracting, something that can make photographing much easier. A messy background can be blurred to the point that it’s no longer spoiling the rest of the scene, giving you more flexibility when setting up your shot.
How Do You Create a Shallow Depth of Field Using Your Phone?
Until recently, getting a shallow depth of field on a smartphone was all but impossible. However, the latest models now take advantage of multiple lenses and use some digital trickery to achieve a very similar result.
If you choose Portrait Mode, your phone will pick out your subject and then blur the background, and some phones do this automatically depending on what the camera detects. The transition from in-focus to out-of-focus might be a little inconsistent because the system has some limitations, however, this is usually fine for Instagram as your images will be viewed on a small screen. But keep in mind that it might look odd if you zoom in or publish it quite large on a website.
How Do You Create a Shallow Depth of Field Using a Camera?
On a camera, this largely comes down to lens choice and fortunately, the lenses best suited to achieving a cinematic look are also some of the cheapest.
Manufacturers describe lenses using two numbers. Firstly, there is the focal length which is measured in millimeters (mm). The higher the number, the closer it will make objects appear. Secondly, there is the aperture which is given an f-number and describes the maximum amount of light permitted by the lens’s opening. The wider this aperture, the less of what is in front of the lens is going to be in focus. Without going into all the physics, just remember this – the longer the focal length and the lower the f-number, the more background blur is going to be available.
Don’t rush out and buy a 200mm f/2.8 lens, however. This would be incredibly expensive and require you to be quite far from whatever you’re shooting. A good compromise — and fortuitously, also a very cheap one — is the 50mm f/1.8, often referred to as the “nifty fifty”. 50mm is very close to what our own eye sees which means it has a natural field of view, and f/1.8 is a fairly huge aperture.
Thanks to a quirk of science, nifty fifties are some of the easiest lenses to make which renders them refreshingly affordable. For example, you can buy a Yongnuo 50mm f/1.8 for a Canon full-frame camera for less than $60 — and it comes with autofocus. Things won’t be very sharp as you head towards the corners of your photographs but as will be discussed below, perfect, crisp images aren’t necessarily what we’re after.
If you’re shooting on an APS-C, a 50mm lens will give a narrower field of view because of the crop factor created by the smaller sensor. 50mm will be closer to 75mm, and on Micro Four Thirds, it will be 100mm — making it feel a lot tighter. You will need to do some maths to find the equivalent lens — try 35mm on APS-C and 25mm on Micro Four Thirds — and unfortunately the physically smaller sensor in these cameras makes differential focus slightly trickier to achieve. It’s definitely not impossible, however, and a nifty fifty will still do a fantastic job.
If the options for your camera are looking expensive, don’t forget that manual focus lenses tend to be much cheaper. If you’re not shooting subjects that are moving, autofocus might be a luxury that you can do without.
One of the added bonuses of lenses with wide maximum apertures is that they are excellent for shooting in low light. This will give a load more flexibility when shooting indoors, whether it’s portraits or product shots, though it’s always best to try and shoot with as much light as possible. Big windows and skylights are definitely an advantage.
If you’re not in the market for a new lens, use your existing lens but choose the maximum available aperture. A quick way to achieve this is to select Aperture Priority (often marked “A” or “Av on the dial) and choose the lowest available number.
2. Ditch Perfection: Try a Vintage Lens
Digital photographs can have a very clean and clinical feel to them, making them seem too perfect and devoid of soul. Blending some old school technology with your shiny digital camera is a great way to inject some character into your images and a vintage lens will deliver this by the bucketload.
Vintage lenses can create distinctive images, especially when shooting wide open (i.e., at their maximum aperture), often giving a bokeh effect that goes swirly in the corners and with heavy vignettes (i.e., darker edges). You might also get some unique flares and other imperfections when bright light catches the lens at a specific angle.
There are loads of vintage lenses available and they’re rarely expensive, though you will almost certainly need an adapter to be able to attach them.
3. Don’t Blow Your Highlights
There is a trick to replicating the ability of a cinema camera – don’t blow your highlights. When it comes to editing, it’s far easier to lift shadows than it is to recover highlights, and a bleached sky can ruin a good photo.
Cinema cameras have a much higher dynamic range than most stills cameras which gives filmmakers the ability to capture bright skies and deep shadows within the same shot but without losing detail.
Manage Highlights Using Your Phone
If you’re shooting on a smartphone, try using HDR mode, keep your phone still and tell your subject not to move. Your phone will shoot several different exposures and automatically blend them together to give a final image that balances the shadows and highlights.
Be aware that this can do strange things to the colors, however, so you might want to edit your photograph and reduce the saturation. Excessively vibrant and contrasty colors are not part of the cinematic aesthetic!
Manage Highlights Using Your Camera
Cameras with larger sensors have greater dynamic range so you stand a much better chance of lifting detail from the shadows in photos shot on a full frame camera than you do on your smartphone.
As a general rule, the older your camera and the physically smaller its sensor, the more it’s going to struggle to create a balanced image in a high-contrast situation. For example, if you’re outdoors looking up at a subject, you might feel like you have a choice between exposing for the sky and making your subject too dark, or exposing for your subject and losing all of your sky.
When you come to edit your underexposed image, don’t reach for the exposure sliders. Instead, go straight for the shadows slider and be generous. You can also bring down the highlights slider to attain even more balance. Make sure not to overdo it, however: take a break from your editing and revisit it with fresh eyes. Always keep in mind that if the first thing a person sees when looking at the photo is your editing, you’ve taken it too far.
4. Shoot Into the Light
Placing your subject with their back against the sun (or another bright source of light) can make it tricky to expose your photograph correctly but it can produce great results. Having the face turned away from the light will avoid creating harsh shadows from the nose and under the eyes and chin, and the softness is more flattering.
Some cameras and lenses might struggle to focus when there’s a bright light source pointing directly into the lens. One trick is to block the light with your hand while you take focus.
You don’t have to position yourself so that the light is directly behind your subject, but doing so might achieve some nice lens flare or sun stars. This might also create a dreamy, slightly washed-out look as letting light directly into the lens can cause a drop in contrast. Try letting a little bit of light creep around your subject and directly into your lens and see what happens. Shoot loads and you might get some happy accidents, too.
Another advantage of cheaper lenses — especially vintage lenses — is that they tend to have more pronounced lens flares, though keep in mind that you might not want to overdo it! To get the most pronounced flares, make sure to remove your lens hood and let the light come in at a slight angle — lens flares are often produced as a result of light bouncing off the insides of the lens.
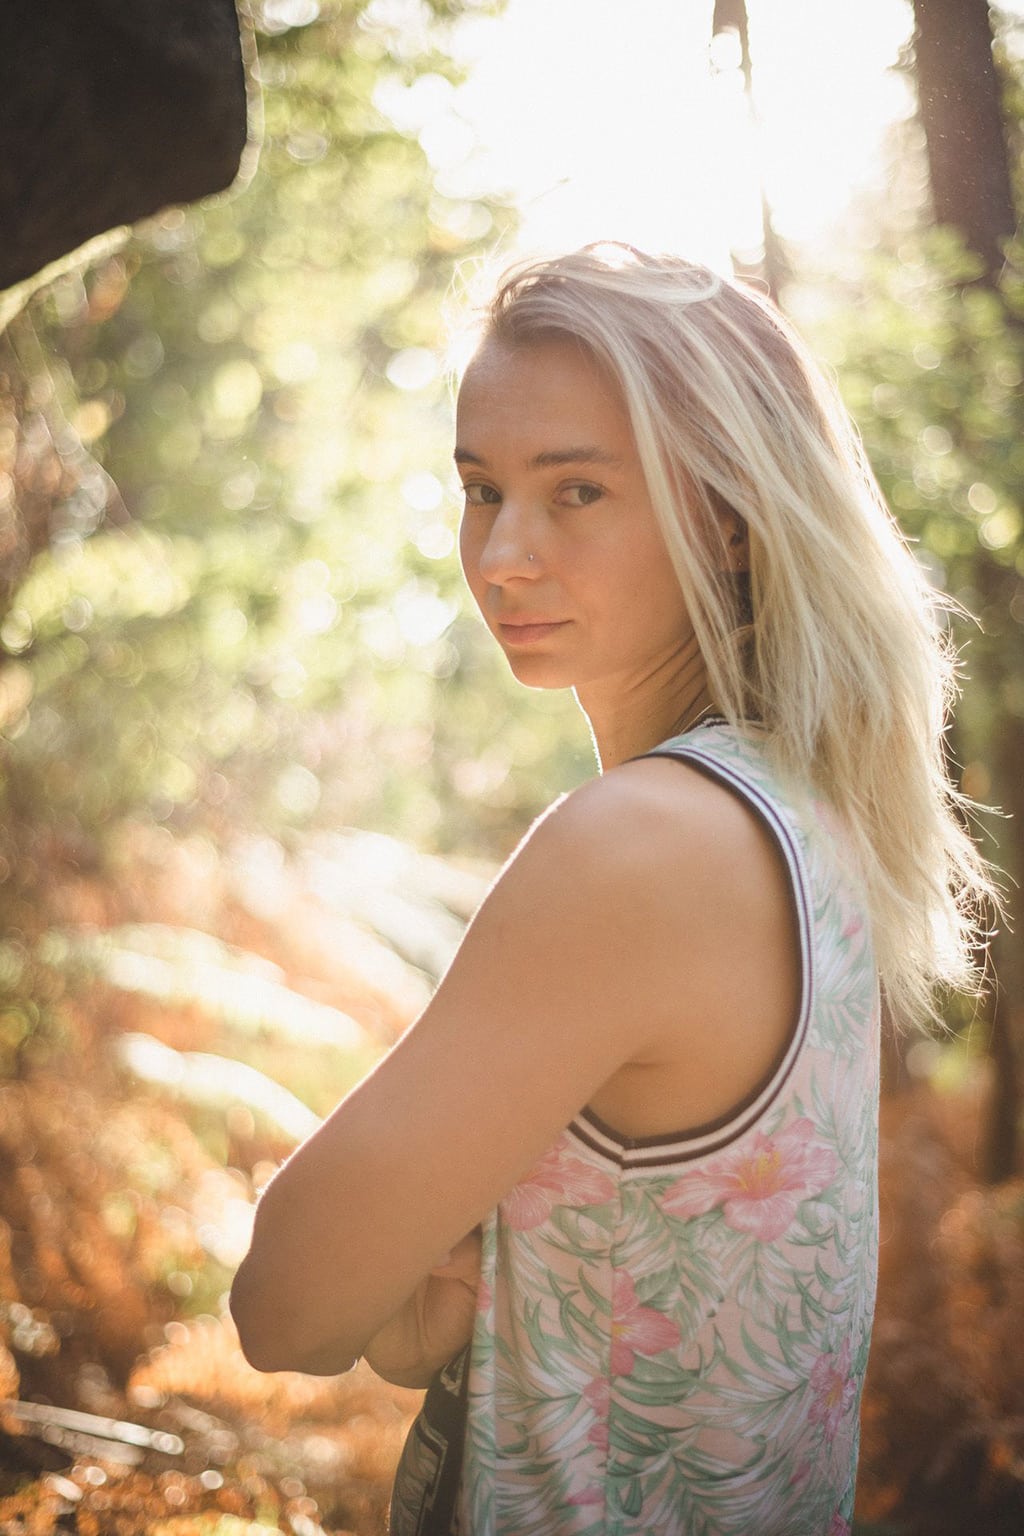
5. Shoot During Golden Hour
It’s not unusual for movie directors to insist on only shooting when the sun is low in the sky, simply because of the warm quality it creates and the fact that the angle creates a beautiful sidelight — as opposed to the harsh, overhead light of midday — that makes any subject look heroic.

Shortly after sunrise and late afternoon are the times to shoot, though of course capturing photos in golden hour is much easier if you live in California compared to, say, the north of England.
For portraits, try placing the sun behind your subject to create that backlit feel described above, or position them so that the sun is full in their face, filling up all of the shadows and making their skin glow. The angle of the chin can make or break this set up so pay close attention to any heavy shadows.
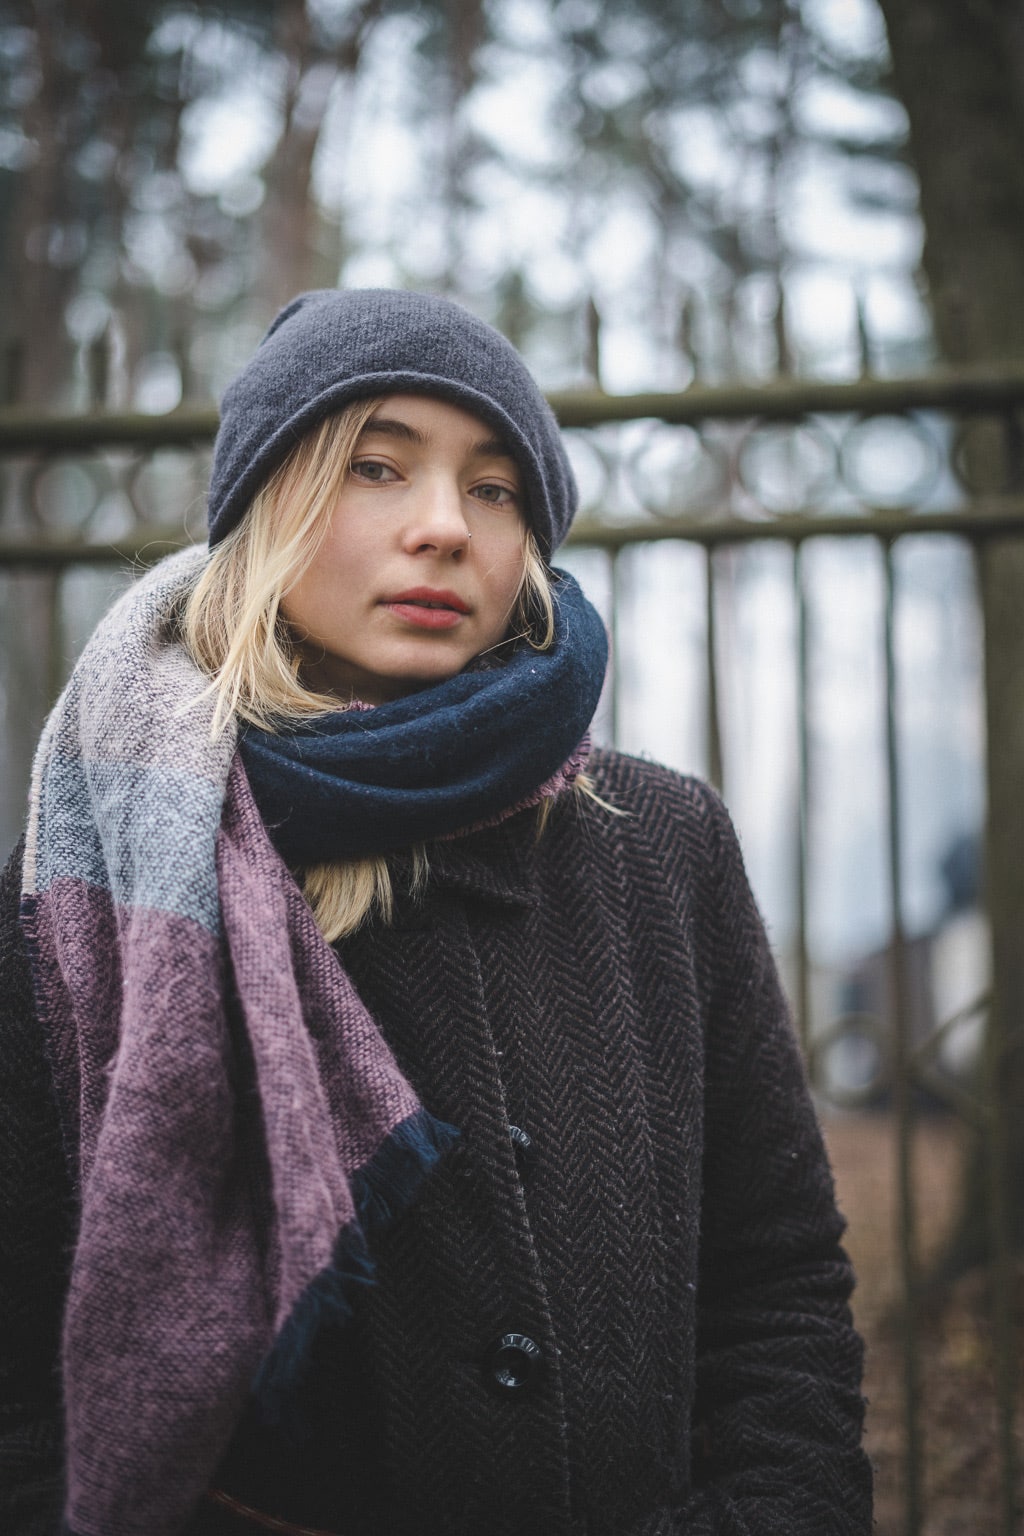
6. Shoot During Blue Hour
Blue hour can be just as magical as the golden hour, creating a soft, cold feel to images that can give an air of mystery and anticipation. Images won’t be as bright, saturated or full of contrast compared to golden hour, but the softness makes for beautiful portraits and can give any subject a magical vibe.
It can be far more fleeting than golden hour, being those moments before the sun appears above the horizon or just after it has set. You’ll have around 20 to 30 minutes in which to shoot so be sure to scout your location in advance and make sure that your gear and your model are ready to go. If you’re in the city, you can mix in streetlights, or lights from buildings to create an enchanting in-between atmosphere.
Light levels will be low so that wide aperture, nifty fifty lens mentioned above will come in handy.
7. Create a Huge Light Source
For most of their time on screen, movie stars are perfectly lit with a massive light source that’s been hidden just out of shot.

In a similar vein, you can make a subject look like they’re on the cover of a magazine with the use of a strobe (a.k.a. flashgun) and a large modifier that diffuses the light.
Gear has progressed dramatically in the last few years so that photographing with lighting equipment no longer requires in-depth technical knowledge and lots of investment. You’ll need a strobe, a wireless trigger, a soft box and a lightstand. Most systems now do a lot of the hard work for you and making changes is as simple as turning the power of the flash up or down.
The results can look incredibly professional and for less than $500 and about a 15-minute setup, you will have transformed your photography.
If that sounds expensive, the next best thing is a large window or skylight. If it’s a sunny day, you can recreate the diffused light from a softbox by hanging a set of sheer curtains which will set you back less than $15. Position your subject so that they are side-on to the window. Bed sheets (or more sheer curtains) can come in handy here, acting as a clean background or as a reflector to fill in any shadows on the side of your subject that’s furthest from the window.
8. Color Grade Your Photos
The orange and teal look might have become slightly cliche but that doesn’t mean that it’s no longer a popular choice — just try not to go too crazy. Whether it’s on your phone or your laptop, most editing software will give you the option to create a split tone or color grade. This allows you to add a gentle hue to the highlights (orange) and the shadows (teal). Orange is great for skin tones and brings a lot of warmth to an image, and being on the opposite of the color wheel, teal acts as the perfect complement. If you want to take it even further, you can start tweaking your individual color sliders and shift your blues towards aqua.

You don’t have to use orange and teal but whatever you choose, grading tends to be most effective if you use it consistently across your website or socials. You can even draw on your company’s own branding to guide your color choices and bring a coherency to all of your visuals.
9. Get Creative With Your Editing
Digital photos have a clinical feel to them that can feel almost hyperreal, a long way from the physicality of movies shot on 35mm film. Editing is our means of overcoming this and adding grain and a vignette can go a long way to making an image that seemed overly sharp and a bit too crunchy into something that has a softer, more tactile feel to it.
Overlaid textures, light leaks and flares can add to the effect and all popular image editing software allow you to drop these into place with a minimum of effort.
Conclusion
Creating a cinematic look for the photographs on your social media and websites can be easy to achieve with just a few simple tricks. In addition, investment in a couple of pieces of gear can open up even more new opportunities.
_
About the author: Andy Day is a British photographer and writer living in a huge forest in France. He began photographing parkour in 2003 and has been doing weird things in the city and elsewhere ever since.