When you take your first steps in the photography industry, one of the very first things you may hear is that you need to know your equipment well if you plan to succeed as a professional photographer – and it is to the end of that notion that learning how to use post-production software takes place.
Adobe Lightroom, which started as sort of a spin-off by the creators of Adobe Photoshop, has now earned a reputation of its own. Becoming the industry standard for post-producing photography, Lightroom implements a workflow that reminds users of old post-processing methods, while it maintains a friendly environment that fits the needs of both beginners and professionals.

I personally use Adobe Lightroom for editing my travel photography over on Just Globetrotting.
It is designed to enhance every single aspect of the photography work we produce in our daily lives – regardless of your personal skills – becoming the best digital friend you could ask for.
Through this guide, we are going to learn the essential aspects that make Adobe Lightroom such a marvelous tool for contemporary photographers.
First-glance impressions of the Adobe Lightroom Interface
Users love Lightroom for its ease of use: there are no hidden tools, everything is neat and organized into modules and tabs, providing a fluid workflow for each task needed.
Unlike Photoshop, we actually don’t need to use the menu bar on top unless we want to explore advanced features or modify preferences for tools, everything is placed at each tab of the module we are working with.

If by chance we want to print a picture afterwards editing it, all we need to do is switch from the Develop Module to the Print Module and the job is halfway done. Perhaps at first glance the appearance of those modules don’t differ too much, since the structure is quite similar. But at tabs and tools is where the difference relies and the charm of Adobe Lightroom takes place. In only a few seconds everything can happen: from importing to editing, and then exporting the job done.
Presets inside Lightroom
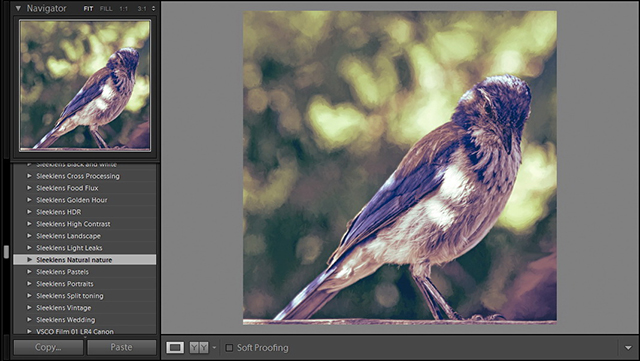
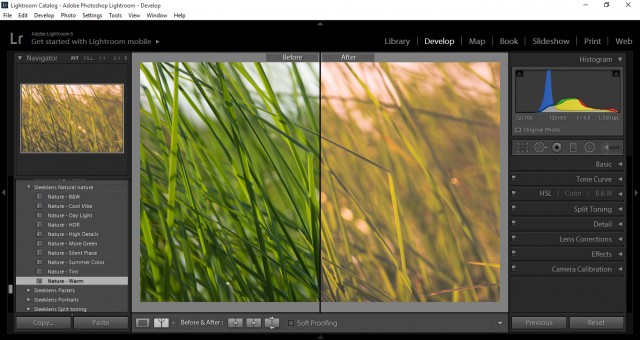
Instead of filling the Lightroom install folder with references for launching third party plugins at startup, the way we see it with Adobe Photoshop, Presets are the bright star of Lightroom’s outstanding performance. Specified as sets of parameters defined on Lightroom’s tools for achieving desired effects, these elements provide users with the capacity of quickly adjusting a photograph, even with little knowledge of the software itself.

Several designers worldwide create presets for functions we can enjoy on a daily basis, such as Sleeklens or GraphicRiver. With the particular aim of making you a better photographer, they provide various bundles for application with such scenarios as Cross Processing, Food, Portrait, Nature, Landscape, Vintage, etc. From there, select one of the preset bundles and Sleeklens does the job for you!
Lightroom Workflow and Tools
Lightroom is suitable for users from occasional photographers to professionals, and for all of them, the workflow looks pretty similar.
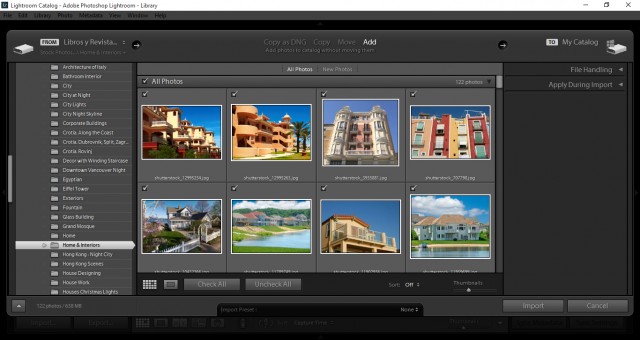
First of all we need to import the pictures inside the software, which can be achieved via the Import command at the Library module. Remember that Lightroom makes its own catalog, and depending on the quality of your camera and the kind of file used (since Lightroom can handle videos as well as photos), hard drive space can become an issue if you don’t have plenty of it.
By workflow we group all the procedures needed to accomplish the process of digital post-production. Since the first time you open the Develop module to the exporting/printing/publishing moment, everything you need to do can be resumed in these simple steps:
1. Correcting White Balance: Above the Basic Adjustments you will see a set of two sliders named Temp/Tint as well as an Eye-Dropper tool (actually named Dropper tool). Use these elements in order to get the proper White Balance values for your image, and try to accomplish this task before you even consider making further adjustments as doing it later on will affect hue tonality of your image.
2. Basic Adjustments: Adjustments can applied to Highlights/Whites/Shadows/Blacks parts of your image. Keep an eye on the Histogram; it can quickly become your best friend for managing this kind of modifications.
3. Further Adjustments: These adjustments are the ones applied to Clarity (to bring more detail and life to the image), Vibrance (to enhance the hue of an image) and Saturation (to determine how much tint the image has).
4. Additional Effects: From this point, everything else you do is intended to be as an extra effect. Lightroom provides several options for enhancing our pictures which can be managed with tools such as Tone Curve, Split Toning (for changing the tint in either Shadows/Highlights) and Sharpening.
5. Lens Correction: Meant for correcting aberrations made by the camera; you can either work with a camera profile or set the adjustment parameters manually. This tab also gives option for adjusting the perspective of an image as well as adding Vignetting effect.
6. Presets: Lightroom’s creative spot. Presets can be so versatile that can accomplish the tasks of steps from 2-5. Remember to add them to your common workflow, you won’t regret the wide range of effects they can give to your images.
After getting a quick glance on what Lightroom can give us, let’s go through some killer tips that will make your performance in Lightroom a 100% more effective:
1. If your camera allows it, always work in RAW. JPEG format performs a compression when saving the image and this translates into losing considerable detail in our images. When working with RAW, the image is uncompressed, meaning you ought to use Lightroom in order to develop it, and only your skills will determine how good the image turns out to be.
2. Always use caution when working with the Exposure slider. Increasing the value on the exposure slider means increasing the ratio of lost detail due to burned areas. Instead, compensate by using the Basic Adjustment panel sliders, as this will produce a much richer image.
3. When we talk about increasing Whites and Highlights, this means going towards the positive values on the sliders. In case you want to increase Blacks and Shadows, go with negative values for those sliders, as positive ones will decrease the amount of Blacks and Shadows present on the image.
4. Having a good library of presets can make all the magic happen in just a few clicks.
5. Quickly add more detail to the image with the Clarity slider, but remember that this also adds noise.
6. Vibrance and Saturation sliders are the way Lightroom (like Photoshop) handles the amount of hue present in our images.
7. Before/After represents a quick and effective way to get all the modifications made in the original file without having to export the processed image.
8. Camera profiles for Lens Corrections should be stored at the Lightroom install folder, and a backup should also be kept as a backup on an external drive. They are quite hard to come by, so be sure to store them at a safe location.
9. Vignetting and Split Toning are always great finishes in every kind of situation. Use them if you want to improve your Adobe Lightroom performance.
10. If you happen to have insufficient HDD space, clean out your Lightroom Catalog, as it takes up a great amount of disk space.
Do you have any more Adobe Lightroom tips to add?
If I have good skill about adobe light room but today i am very happy to read this tutorial because it’s improve my skilled and working experience. Thank you for wonderful sharing.
Apologies if anyone had trouble downloading the Quick Start eBooks overnight. Spammers hammered the form and the web host therefore shut down the script while I slept. I’ll email any email addresses that were captured shortly with the download link, and there is a replacement form now in place.